


Not every space gives you permission to drill into the walls, and sometimes you just don’t want the hassle. Whether you're in a rental, prepping for a pop-up, or just like the option to move things around later, there are better ways to get an acrylic sign on the wall without reaching for power tools. A few smart options - some tape, a hook, maybe a well-placed shelf - can hold things up just fine, as long as you think through weight, surface, and the kind of sign you're working with. Here’s how to keep it clean, centered, and hole-free.
When Drills Don’t Make Sense
Not every space is drill-friendly - and honestly, not every sign needs it. If you’re renting, setting up a pop-up, or just want to avoid patching things later, going no-drill is often the better move. Some wall types make it tricky anyway. Tile, brick, old plaster… none of them love a screw.
Lighter acrylic signs can hold just fine with the right adhesive or hook setup. Clean wall, clean back, and a strip or two of solid tape is often all it takes. Even gallery-style hangs can be done without touching a drill - just a little planning and a steady hand.
It’s also about flexibility. Mounting without hardware means the sign can move with your space - whether that’s a new wall, a new layout, or just a new idea. No damage, no commitment, and no drywall dust in your coffee.
![]()
Why Most Signs from Signs and Mirrors Don’t Need to Be Mounted
At Signs and Mirrors, most of what we make is designed to stand on its own - literally. The majority of our signs are freestanding builds like foldable A-frames or upright stainless boards. No drilling, no brackets, no wall damage. Just clean, portable pieces you can set down and reposition as your space or setup changes.
Acrylic signs in particular - like our transparent and opaque A-frames - come pre-built for sidewalk use, pop-up installs, or indoor displays. If a piece is going on a wall, we usually keep it simple: lightweight panels, pre-drilled when needed, or backed with adhesive on request. Hanging shouldn’t be complicated.
You can see the collection in action on Instagram. Some signs are outside cafes in LA, others live in Brooklyn shops, a few pop up at brand events and storefronts. However they’re used, the goal’s the same: make something that works hard, looks sharp, and doesn’t ask too much from your walls.
A Few You’ll See in the Collection

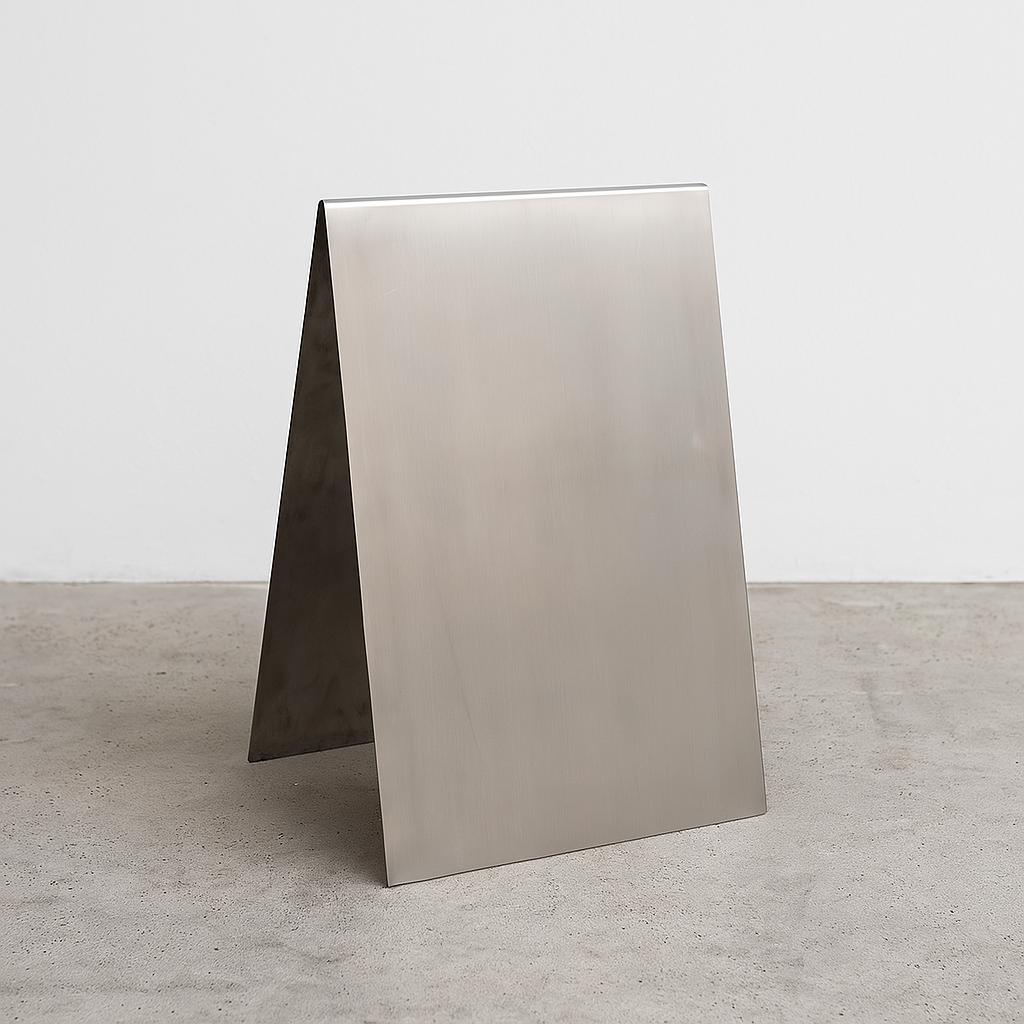
1. Mirrored Acrylic A-Frame Sandwich Board Sign
005 - Mirrored Acrylic A-Frame Sandwich Board Sign features a mirrored finish on both sides and a lightweight. It folds flat for storage and can be ordered blank or printed. Built for sidewalk use, pop-ups, and spaces where presentation matters.
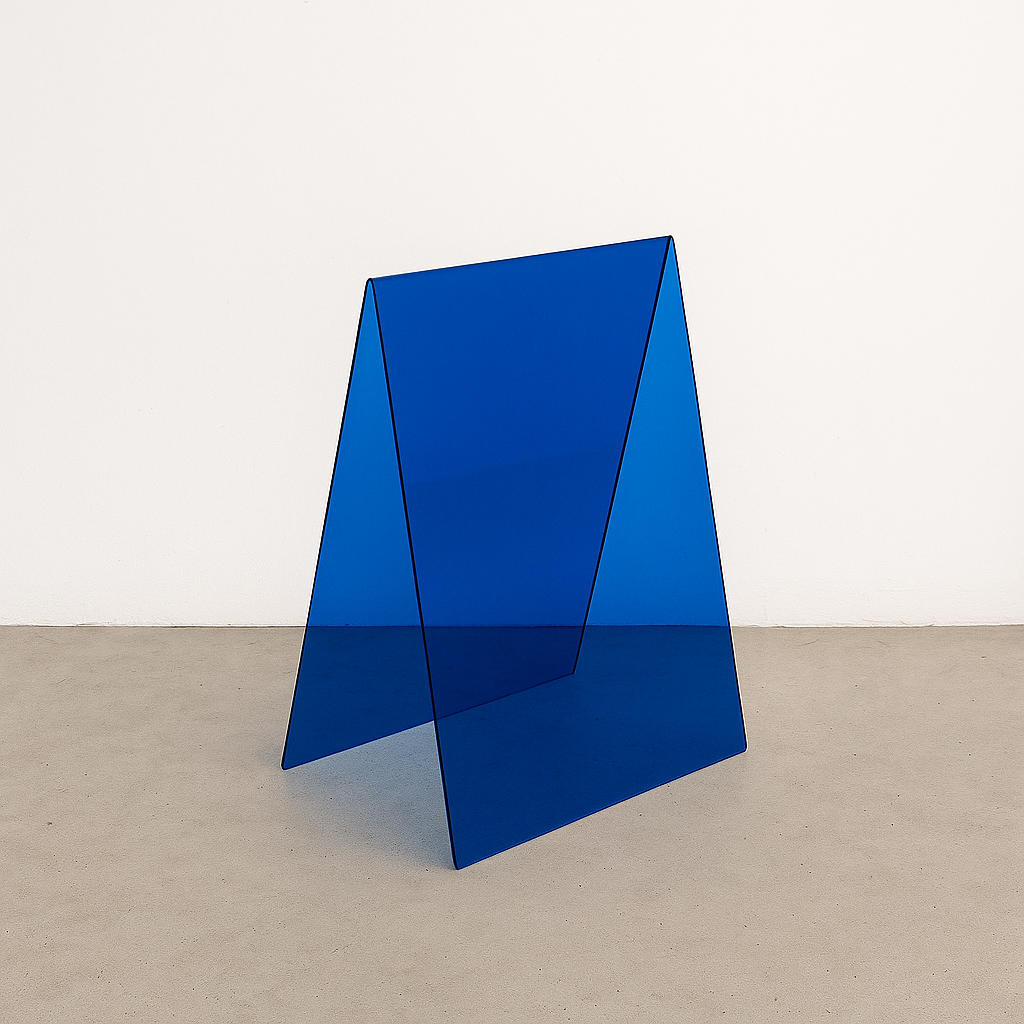
2. Transparent Acrylic A-Frame Sidewalk Sign
#009 - Transparent Acrylic A-Frame Sidewalk Sign is made from a single sheet of glossy finish. It stands clean and modern on its own - no wall, no frame - making it a solid option for storefronts and events.

3. Opaque Acrylic A-Frame Sidewalk Sign
#010 - Opaque Acrylic A-Frame Sidewalk Sign uses bold, high-quality acrylic with a glossy finish. Sides can be customized, and the build is light but sturdy - ideal for indoor retail or outdoor foot traffic.
No-Drill Ways to Hang an Acrylic Sign That Actually Work
You don’t need to put holes in the wall - or the sign - to get a clean install. If your acrylic piece is on the lighter side, there are a few simple options that hold surprisingly well and keep things renter-friendly, gallery-ready, or just less permanent.
Adhesive Strips (The Easy First Move)
For thin acrylic signs and smooth surfaces like painted drywall, glass, or tile, high-strength adhesive strips (like Command™) do the job. Clean the wall and the back of the sign with alcohol, line it up carefully, press, and let it set. Give it at least 24 hours before applying full weight or handling, though the initial set can occur in 1 hour. Best for low-traffic zones or indoor installs where weight isn’t a major issue.
Velcro for Swaps and Temporary Installs
Velcro strips give you a little more flexibility. They hold light to medium-weight signs, peel on and off cleanly, and let you reposition if you need to adjust height or take it on the go. Great for pop-ups, gallery setups, or anywhere you’re switching signs out often.
Clear Mounting Tape (If You Want Invisible)
Thin acrylic panels can sit flush against the wall using clear, double-sided tape. It disappears once mounted and gives a sleek, no-hardware look. Only works well if the wall is totally smooth - and only if the sign isn’t too heavy. Prep is everything: wipe down both surfaces and don’t rush the placement.
Hooks and Wire for Pre-Drilled Signs
If your sign has holes or top slots, use adhesive wall hooks and a clean wire or fishing line to hang it gallery-style. Space the hooks wide enough for balance, and keep the wire short so the sign stays close to the wall. It’s a more styled look, but still avoids the drill.
Leaning Signs (Zero Install Required)
Sometimes the best option is no mounting at all. If your acrylic sign is large enough or has a solid base, just lean it. Shelves, ledges, counters - it all works. At Signs and Mirrors, a lot of our pieces are built for this exact kind of freestanding display. No tape, no tools, and no mess when it’s time to move.
Things to Think About Before You Hang Anything
Even if you're skipping screws, a little prep goes a long way. Here’s what to think about before you stick, lean, or hang that acrylic sign with no hardware.
- Wall surface: Adhesives only work well on smooth, sealed walls - like painted drywall, tile, or glass. Rough or porous textures? You’ll probably need a different plan. Always clean the surface first.
- Sign weight: Thicker or oversized acrylic signs can be heavier than they look. Check the weight limit on your adhesive strips or tape, and don’t assume “lightweight” means “will hold.”
- Humidity and heat: Steam from bathrooms or direct sun near a window can significantly weaken standard adhesives over time by causing softening or reduced bond strength; always use moisture- or heat-rated mounting products, such as water-resistant Command™ strips, for such setups.
- Install duration: For a one-day event or quick pop-up, use something easy to remove. For longer-term installs, go for stronger bonding materials and give them time to set properly.
- Clean removal: If you're renting or mounting onto a visible wall, test the adhesive on a small spot first. Some leave residue or lift paint when removed.
- Alignment: No-drill methods don’t leave much room for error once things stick. Use painter’s tape or a level app to get it straight the first time.
Getting It Up Straight (And Keeping It There)
No-drill installs are all about setup. A few extra steps up front can keep your acrylic sign from ending up crooked, peeling, or worse - on the floor. Here’s what to double-check.
- Test the placement before you commit: Use painter’s tape or even a piece of paper the same size as the sign to block out the space. Step back, adjust, and only move forward when it feels right.
- Clean the surface really well: Adhesives hate dust, oils, or humidity. Wipe both the wall and the back of the sign with rubbing alcohol or a degreasing wipe. Let it dry completely before sticking.
- Let adhesive cure before hanging weight: Don’t rush it. Even high-strength tape needs time to bond. Once it's in place, leave it alone for at least an hour - longer if it’s humid - before adding the sign.
- Use a level - even if it’s just your phone: Slight tilts become obvious fast, especially with clean-lined acrylic. A bubble level app works just fine if you don’t have a physical one handy.
- Press evenly, not aggressively: Apply pressure across the entire strip or tape area. Pushing one corner too hard can create bubbles and lead to uneven grip.
- Check back in a few days: Revisit the sign after 48 hours. If something feels loose or looks off, replace the adhesive before it gives out completely.
Conclusion
Hanging an acrylic sign without drilling isn’t just doable - it’s often the better option. Whether it’s adhesive strips, a clean hook setup, or just leaning the piece where it works best, it all comes down to knowing the weight, surface, and space you're working with. At Signs and Mirrors, we build most of our signs to be portable and freestanding for exactly this reason. You don’t always need a toolkit to make something look sharp. Just a little prep, a level head, and the right kind of tape.
If you’re unsure about how to hang a specific piece - especially if it’s one of ours - reach out. We’re happy to walk through the setup with you. Or head over to Instagram to see how others have styled theirs. You’ll see: simple works. Clean install, clean space.
FAQ
Can I use Command™ strips on thicker acrylic signs?
It depends on the weight. Thin or mid-weight acrylic usually holds fine, especially on smooth walls. For heavier pieces, go for multiple strips or a different method entirely - like hooks or even just leaning the sign if possible.
What surfaces are best for no-drill adhesives?
Painted drywall, tile, sealed wood, and glass tend to work best. Anything textured, dusty, or porous (like raw brick or rough plaster) usually fights the adhesive and wins.
Do you need to prep the wall before sticking a sign?
Yes. And it makes a big difference. Clean the wall with rubbing alcohol or something that removes oil and dust. Same for the back of the sign. If either surface is dirty, the adhesive won’t hold long.
What’s the cleanest removable option for temporary installs?
Velcro-style strips are usually easiest to remove without damage. They hold well and let you swap signs in and out without peeling paint or leaving residue behind.
How long should I let adhesive strips cure before hanging the sign?
At least 24 hours for full strength, especially in humid spaces where curing may take longer. Press them in place firmly, walk away, and let them settle before adding weight. Rushing it is the fastest way to end up with a sign on the floor.